Welcome to the Part 2 of my ‘SAP ECC 6.0 IDES Server’ series in which we are undertaking the effort of setting up our own personal SAP ECC 6.0 IDES server. In this installment, we will continue prepping our Virtual Machine.
In Part 1, we procured the required software and started the setup of our VM. If you’re just joining this series, I suggest you go back and review the preceding articles (Part 1) to get caught up.
STEP 5: Disable Windows Firewall
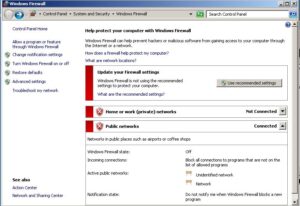
Within your VM, search for “Windows Firewall” and find the setting to turn this off. I am not sure why this is required, but have read this in several places. Since I’m installing this in a VM, I’m not overly concerned with turning the firewall off.
STEP 6: Shut Off Automatic Updates
NOTE: This should be done for both your VM and your Host computer! Use the Start Menu to search for Automatic Updates. Turn this feature off during the rest of this process. The installation take a LONG time and the last thing you want is Windows deciding that it needs to restart in the middle of your software installation. Trust me.
STEP 7: Update Computer Name
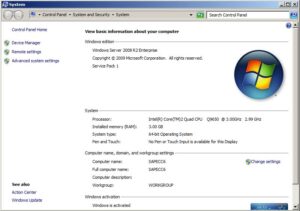
Windows will take the liberty of automatically assigning a computer name during installation of your server OS in your VM. I recommend you change this name to better describe your system and make it easier to identify on the network. I won’t go into detail but here is roughly what you’ll need to do:
- Searching for ‘Rename’ in the start box and select the ‘Rename this Computer’ option.
- In the resulting pop-up, click the “Change…” button.
- Update your computer name. Click ‘OK’ when finished.
- You’ll need to restart the VM for the change to take effect.
Just keep the name short — 13 characters or less, from what I’ve read. I would also avoid any special characters to keep things simple. I’m changing mine to ‘SAPECC60’.
STEP 8: Setup Loopback Adapter
I won’t go too much into details around the LOOPBACK adapter — mostly because I don’t know much about it. I only know that it is required for setting up a stand-alone SAP installation. I assume that SAP relies on certain network resources during its installation and the LOOPBACK adapter provides this.
- Within your VM, navigate to and open the Device Manager:
Start –> Control Panel –> Hardware - Select your computer name by single-clicking on it and select ‘Add Legacy Hardware’ from the Actions menu.
- Click ‘Next’.
- Click’ Install the hardware that I manually select from a list(Advanced)’ and click ‘Next’.
- On the next screen, select ‘Network Adapter’ and click ‘Next’.
- Select ‘Microsoft’ as the Manufacturer and select ‘Microsoft Loopback Adapter’ from the list on the right. Click ‘Next’ and complete the installation.
- You can close the Device Manager and the Control Panel.
- Next, go to:
Start –> Control Panel –> Network and Internet –> Network and Sharing Center –> Change Adapter Settings. -
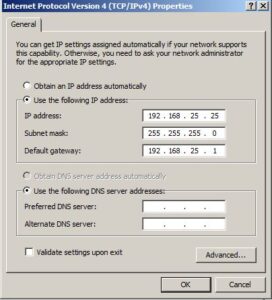
My Loopback Properties with updated IP Address. Right-click the ‘Microsoft Loopback Adapter’ and click ‘Properties’.
- Double-click on ‘Internet Protocol Version 4’.
- Select ‘Use the following IP address’ and Maintain the following:
IP address –> 192.168.25.25
Subnet Mask –> 255.255.255.0
Default Gateway –> 192.168.25.1 - Click ‘OK’ and ‘OK’ and close the Control Panel.
- Test the LOOPBACK Setup:
- Open up a Command Prompt.
- Ping your IP address by typing the following and hitting enter:
ping 192.168.25.25
- You should receive several responses from the IP address. They should look something like this:
Reply from 192.168.25.25: bytes=32 time<1ms TTL=128
STEP 9: Update HOSTS file
The ‘hosts’ file sets up aliases. You can find the file in the following path:
C:\Windows\System32\drivers\etc\
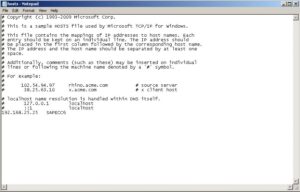
Within your VM, open the ‘hosts’ file with Notepad and add a new line at the bottom of the file with the IP address just maintained and your computer name. Just make sure you have a tab or a space separating the IP address from the alias. Mine looks like this:
192.168.25.25 SAPECC60
STEP 10: Snazzy Desktop Background (OPTIONAL)
I put a nice gold colored SAP background on my virtual server desktop. While this is totally an optional step, it does help to distinguish the server window from other windows which may be open on your host system.
STEP 11: Create Partitions
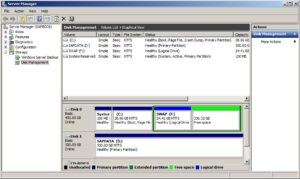
In addition to the OS partition created earlier, create two additional partitions. You can access the Disk Management tool through the ‘Server Manager’ shortcut which
should be pre-installed on the task bar. When you open the tool, you should see two “Disks” — Disk 0 and Disk 1. Create the following:
- A 25 Gig partition called ‘SWAP’. I created this out of the leftovers on ‘Disk 0’.
- A 500+ Gig partition from ‘Disk 1’ labeled ‘SAPDATA’.
I won’t go into detail; just right click on the ‘Free Space’ areas and select ‘New Simple Volume’ to get started. I named them as follows:
- 25 GB: “SWAP”
- 500+ GB: “SAPDATA”
Just a note that when all is said and done, my setup — including multiple snapshots — totals about 390 gigs. Thankfully, storage is cheap these days.
STEP 12: Configure Virtual Memory
According to SAP, a recommended/required amount of virtual memory is specified: 20480 Mb. We’re going to use that separate SWAP partition for this purpose:
-
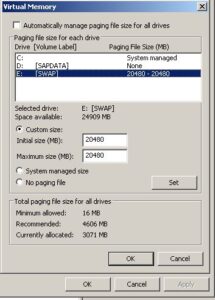
What my Virtual Memory settings look like. Go to ‘Start’ and right-click on ‘Computer’ and select ‘Properties’.
- Click the ‘Advanced System Settings’ button.
- Select the ‘Advanced’ tab.
- Click ‘Settings…’ in the ‘Performance’ section.
- Select the ‘Adjust for Best Performance’ option.
- Click the ‘Advanced’ tab.
- Click ‘Change…’ in the ‘Virtual Memory’ section.
- De-select the ‘Automatically manage…’ option, select your ‘SWAP’ drive from the list, select the ‘Custom Size’ option and maintain the following:
- Initial Size (MB): 20480
- Maximum Size (MB): 20480
- Click the ‘Set’ button, then click ‘OK’ and ‘OK’. You will be prompted to restart the system which I recommend.
STEP 13: Setup Shared Folders
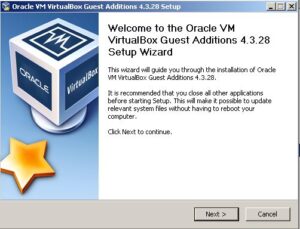
I downloaded the SAP software to the host machine and I need some way to share those files with Server 2008. I did this by setting up a Shared Folder on the host machine:
- Shut down your VM if it is currently running.
- In your VM settings, click on the ‘Shared Folders’ node.
- Click the “+” icon to add a new Shared Folder and choose the folder on the host machine which contains (or will contain) your SAP Installation files.
- Give it a name and check the ‘Auto-mount’ option and then ‘Ok’.
To access that shared folder, you will need to load some additional software into your VM:
- Start up the VM.
- From the VM Menu on the top of the screen, select Devices –> Insert Guest Additions CD Image. You should now see a new “DVD” in your VM called “VBOXADDITIONS”.
- In the Root of that DVD, run the VboxWindowsAdditions… executable which corresponds to your system (32- or 64-bit).
- When completed, reboot your VM.
- You should now see your ‘Shared Folder’ in Windows Explorer setup like a network drive allowing access to your host machine files.
STEP 14: Install JAVA SDK, Environment Variables
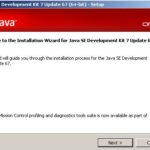
Prior to installing Oracle and SAP, you’ll need to install the Java SDK. Launch the Java installation file mentioned earlier in this article and complete the installation using the wizard. You should be able to install using the default options.
Next, setup the environmental variables:
-
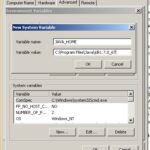
Creating the JAVA_HOME Variable. Go to Start –> Right-click on Computer –> ‘Properties’ –> Advanced System Settings –> ‘Advanced’ tab –> ‘Environmental Variables’ button
- Under the ‘Environmental Variables’ section, click the ‘New’ button. Name the variable JAVA_HOME and set the value to the installation folder for Java and click “OK”. For example, mine is:
C:\Program Files\Java\jdk1.7.0_67 -
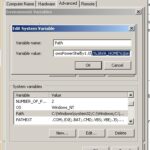
Update the PATH Variable. Next, find the existing variable named ‘Path’ and click ‘Edit…’.
- At the end of the existing path, input the following and click ‘OK’:
;%JAVA_HOME%\bin
Done.
STEP 15: Take Another Snapshot
Why not?! As we did in the last article, it’s a great idea to take a snapshot in VirtualBox. It only costs a little bit of disk space, but can save a whole lot of time. Also, once your server is running and stable you can always go back and delete any of your snapshots.
Part 2 Wrap-up
In this article, I covered how I completed the server preparation. You’re well on your way to your own SAP ECC 6.0 IDES system. I’ve now set the stage for the main event: database and application server installation which will be covered in Part 3.
Ready? Take a deep breath and then continue on to Part 3…








Hi Michael, in general how long did the whole installation process take? From the point of database and application server installation. How many hours exactly?