

 Welcome to the Part 3 of my ‘SAP ECC 6.0 IDES Server’ series in which we are undertaking the effort of setting up our own personal SAP ECC 6.0 IDES server. In this installment, we will tackle the Oracle and SAP installation and cover some post-installation activities.
So far, we procured the required software and completed the configuration of our VM and the installation and setup of prerequisites. We’re now ready to start installing the two main components of our server: Oracle and SAP. If you’re just joining this series, I suggest you go back and review the preceding articles (Part 1, and Part 2) to get caught up.
STEP 16: INSTALL ORACLE 12.1
Now that our VM is configured, it’s time to put some meat on the bones. If you check out the packages you downloaded from SAP, you’ll notice that it calls for ORACLE 11.2 RDBMS. However, I ran into some compatibility messages when doing the SAP install. I ultimately decide to use ORACLE 12.1 (a.k.a. ’12c’) for this installation.
I’m not going to cover each single step in detail:
-
Oracle 12.1: Database Only Locate your Oracle install files. As noted in Part 1, I had issues when I attempted to use Oracle 11g. So instead I opted to use Oracle 12.1 (database and client), also available from SAP’s site. After extracting the package (package 51047709), you can find the installer inside the ‘database’ sub-folder. Execute ‘setup.exe’.
-
Oracle 12.1: Single Instance I opted to leave the email address blank and uncheck the “I wish to receive security updates…” checkbox. It will question your decision; just stay strong and remain uniformed. 😉 Click ‘Next’ and ‘Yes’.
- Skip the updates, if prompted.
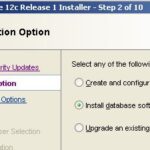
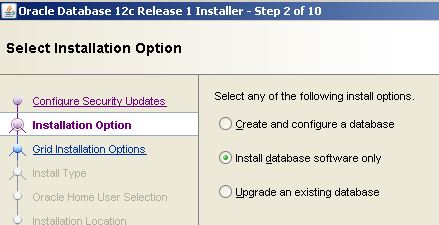
- Select the ‘Install database software only’ option (the SAP installer will create the database). Next.
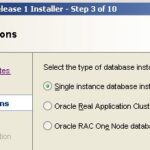
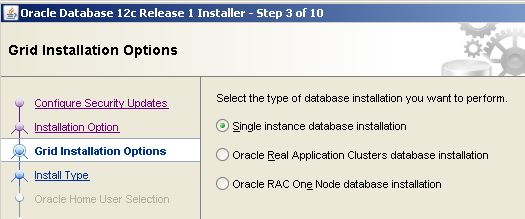
- Select the ‘Single Instance database installation’ option. Next.
- Add any additional languages; I’m sticking with English. Next.
- Select the ‘Enterprise Edition’ option. Next.
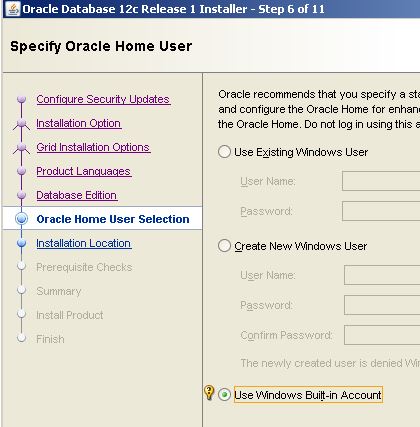
- Select the ‘Use Windows Built-in Account’ option for the “Oracle Home User Selection” screen. Next. It will recommend using a separate user ID with limited privileges; just select “Yes” to continue.
-
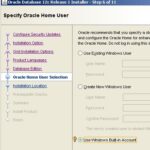
Oracle 12.1: Home User Selection For the installation paths, I left the values defaulted. Just make sure they are pointing to your ‘SAPDATA’ drive, in my case it’s “D:\”. Next.
- It will then do a prerequisite check. No action needed.
- On the Summary screen, verify the parameters you selected and click ‘Install’.
- The installation took about 15 min.
- Restart the VM when the installation is complete.
STEP 17: CHANGE ORACLE “COMPATIBLE” PARAMETER
I had run into an issue later on in the process: The Software Provisioning Manager (SWPM 1.0) prompted me that Oracle client 11.2 was not acceptable; it was looking for 12.1. However, when I installed client 12.1 I received an error during Database creation indicating that the Oracle ‘Compatible’ parameter was not valid. Reviewing this page, I reviewed the ‘INIT.ORA’ file. [NOTE: I also read through notes 1431798, and 1739274 which both deal with Oracle Parameters.]
In Windows Explorer, navigate to the the ‘dbs’ folder to locate your init.ora file. Mine was located here:
D:\app\[USER ID]\product\12.1.0\dbhome_1\dbs
Edit the file using Notepad and find the existing ‘compatible’ parameter. Mine looked like this:
compatible ='11.2.0'
…and based on the SAP Note, I changed it to this:
compatible ='12.1.0.2'
Save the file.
STEP 18: INSTALL SAP ECC 6.0 IDES
SAP Installation will begin by launching the install process from within the SWPM. When you launch this process, a host of options will be presented; each option will include an installation wizard to guide you along the way. While I tried to include as many screenshots as possible, I did omit several steps where I simply chose the default settings proposed by the wizard. There will be two phases to the install: a prerequisites check followed by the real installation.
Check Prerequisites
The first thing I did was run the pre-requisites check. This process will perform some hardware and software checks to make sure that the installation can take place successfully. Following the process I outlined in this series, I never received anything but “OK” messages for each section.
-
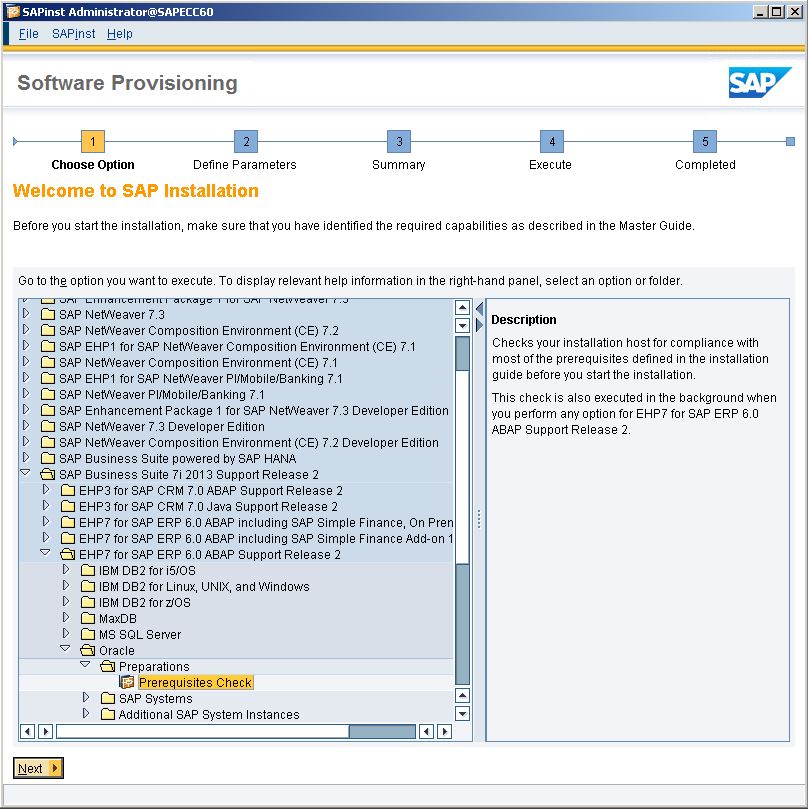
SAP Prerequisite Path Launch the SWPM using the “sapinst” executable.
- Navigate to:
SAP Business Suite 7i 2013 Support Release 2 –>
EHP7 for SAP ERP 6.0 ABAP Support Release 2 –>
Oracle –>
Preparations –>
Prerequisites Check -
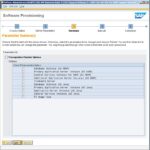
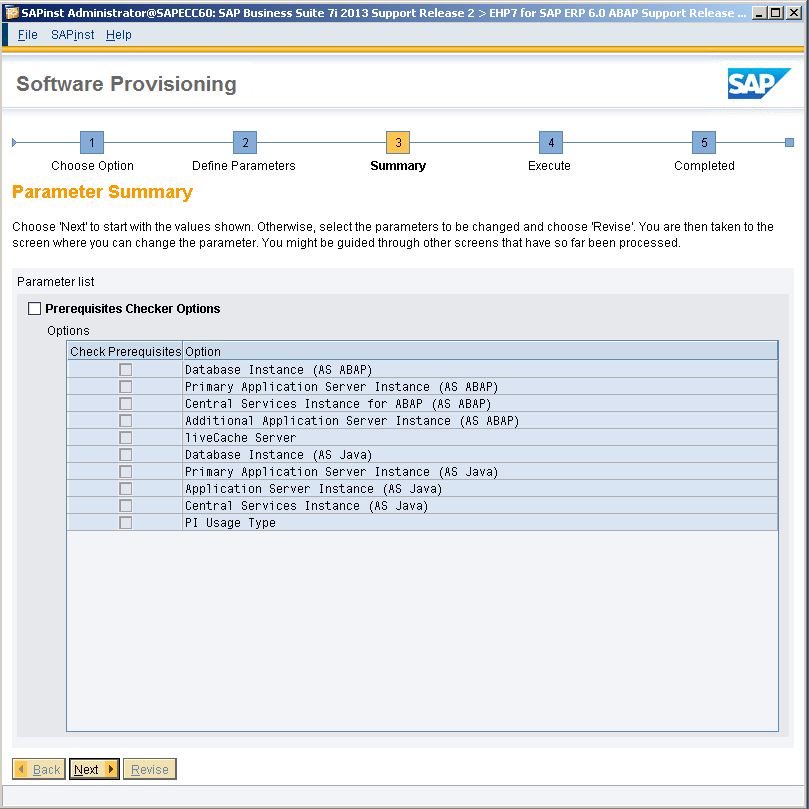
SAP Prequisite: Options. Hit ‘Next’ twice to accept the defaults for the checking parameters. Leaving all the checkboxes empty will only check the critical elements.
- You will see a 2-phase process start to run. It won’t take long — maybe 3 or 4 minutes.
- You will eventually be presented with a table containing the various elements of the prerequisites check. If everything
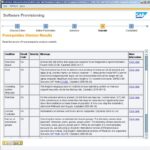
SAP Prerequisite: Results looks good, you should see an “OK” in the ‘Result Code’ column for each item. Click Next.
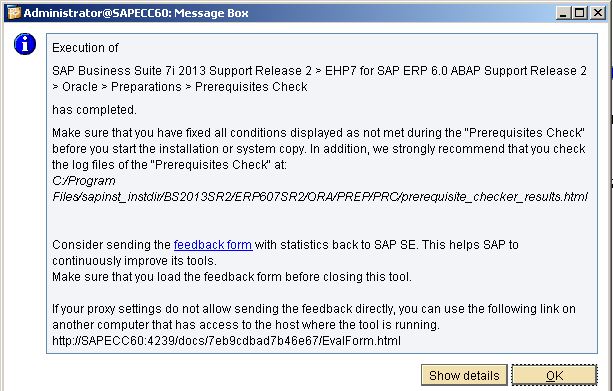
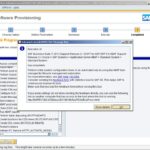
- You will also see a message box pop up indicating that the check has been completed and suggesting that you resolve any checks which may have failed.
- Clicking the “OK” button will close out the Software Provisioning Manager. I’m
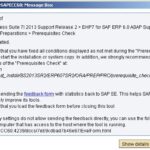
SAP Prerequisite: Completion Message not sure why this is the case, because we’re just going to hop back in there for the real installation.

Assuming that everything went ‘OK’, then we can now start the full installation of SAP. If everything did NOT go ‘OK’, then you’ll need to do some legwork to find out what the resolution should be.
SAP Full Installation
Here we go! There are a lot of steps in this process; however, don’t get intimidated. Most of the options below will just involve selecting the default values.
-
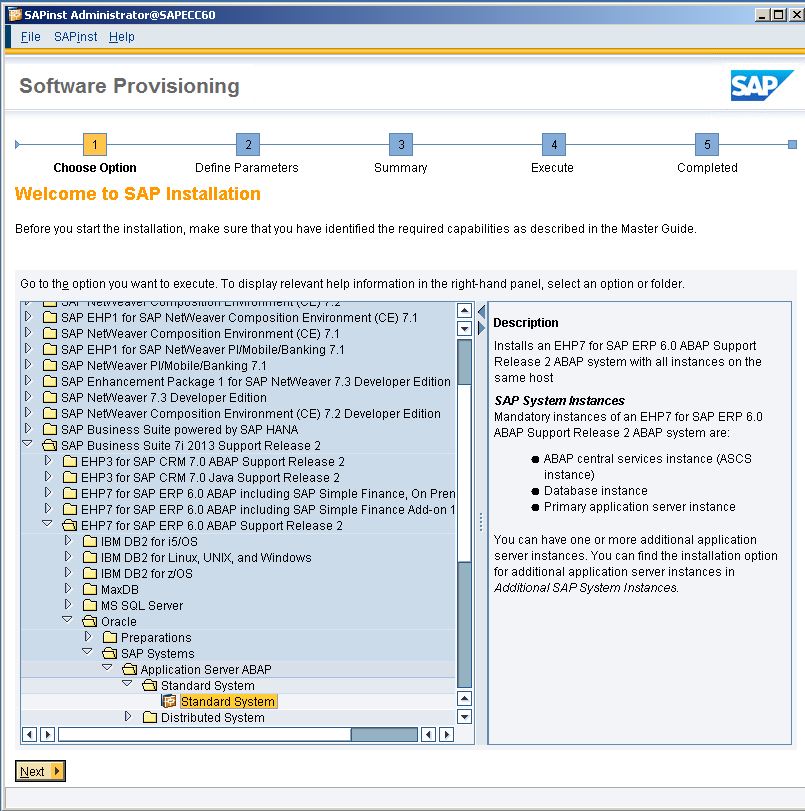
SAP Full Installation Option As you did before, launch the Software Provisioning Manager using the “sapinst” executable.
- This time, navigate here:
SAP Business Suite 7i 2013 Support Release 2 –>
EHP7 for SAP ERP 6.0 ABAP Support Release 2 –>
Oracle –>
SAP Systems –>
Application Server ABAP –>
Standard System –>
Standard System
…and click ‘Next’. -
SAP Full Instatllation: Typical or Custom? Parameter Settings:
On the Parameter Settings, you must select either ‘Typical’ or ‘Custom’. I’ve tried it successfully using both methods. I chose Custom for this install in order to show all the options. Next. You will be prompted that the system needs to log you off in order to continue. Click ‘yes’ and the account is logged off and back in automatically. -
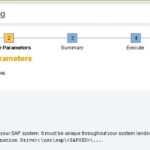
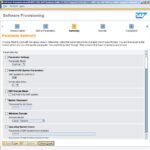
SAP Full Install – System ID General SAP System Parameters:
Choose your SAP system name. This is the 3-digit alphanumeric code which identifies your SAP system. I’m not sure what the restrictions are, but I would use something unique. I’m using “ROM” for mine. Also choose your destination drive; again, for me this is “D:”. Next. - DNS Domain Name:
Uncheck the “Set FQDN for SAP system”. Next. -
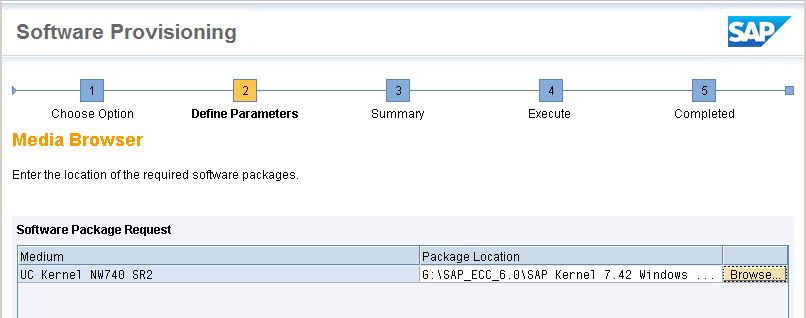
SAP Full Install: 7.42 UC Kernel Media Browser – UC Kernel NW740 SR2:
You’re going to face at least three “Media Browser” screens in which you will need to select one of your installation packages using the ‘Browse’ button. For the UC Kernel (UC = Unicode), navigate to the “SAP Kernel 7.42 Windows Server on x64 64bit” folder (package # 51049350). Make sure you select the package folder which contains the DATA_UNITS folder and click “OK”. Next. -
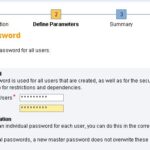
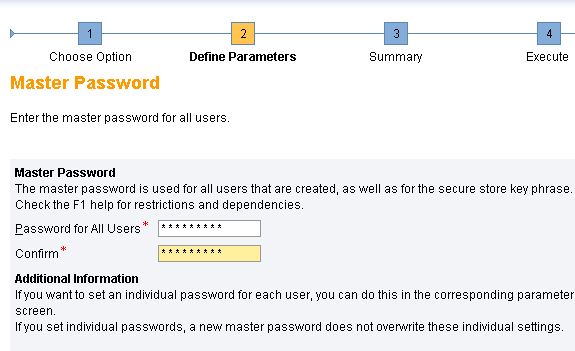
SAP Full Install – Master Password Master Password:
This password is used as the default for all user accounts created during the installation process. You will have the option to replace the passwords for individual accounts if you want to, but this one will be used as the default. Just make sure you remember it.
NOTE: Avoid using a master password containing the “@” symbol. Readers have reported that this causes errors downstream. [Thanks, raghaf2007] - Windows Domain:
Just stick with the ‘Local Domain’ option, unless you know what you’re doing. Next. - Operating System Users:
Just click ‘Next’ to accept the default password you setup earlier. -
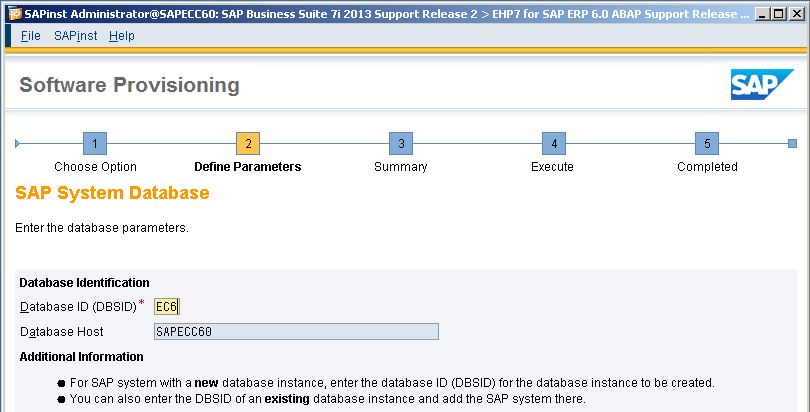
SAP Full Install – SAP System Database ID SAP System Database:
Choose your database ID. This is another three-character identifier. I just chose ‘EC6’ as mine. Next. - Windows Domain for SAP Host Agent:
Again, just choose the ‘Local Domain’ option. Next. - Operating System Users:
This sets up the password for the sapadm account. Just keep your default password. Next. -
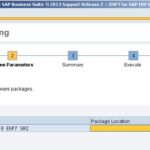
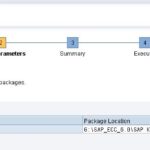
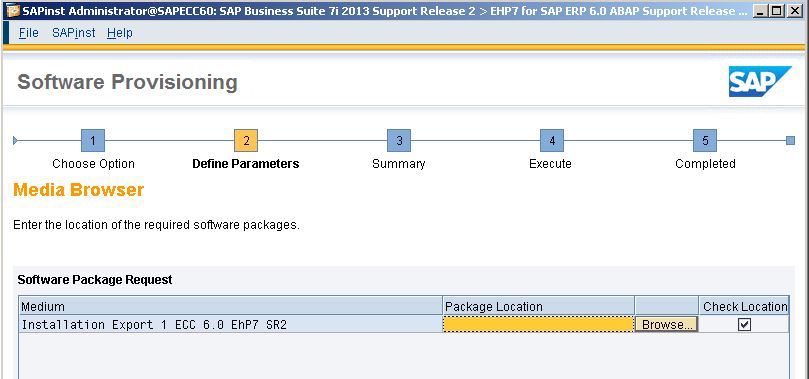
SAP Full Install – Export 1 Media Browser – Installation Export 1 ECC 6.0 EhP7 SR2
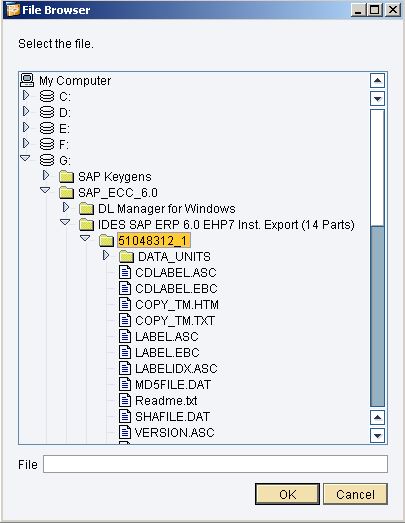
Like the previous ‘Media Browser’ selection, click the Browse button and navigate to your “IDES SAP ERP 6.0 EHP7 Inst. Export” folder. Choose the first package (package # 51048312_1) and click “OK”. NOTE: Don’t select the individual Export folders located inside the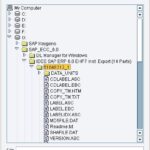
SAP Full Install – Select Package DATA_UNITS folder.
- Media Browser – Installation Export 2 ECC 6.0 EhP7 SR2
Like the previous step, navigate to find the second package in the “IDES SAP ERP 6.0…” folder (package # 51048312_2). Select it, click “OK”. Next. - Oracle Database Destination:
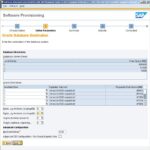
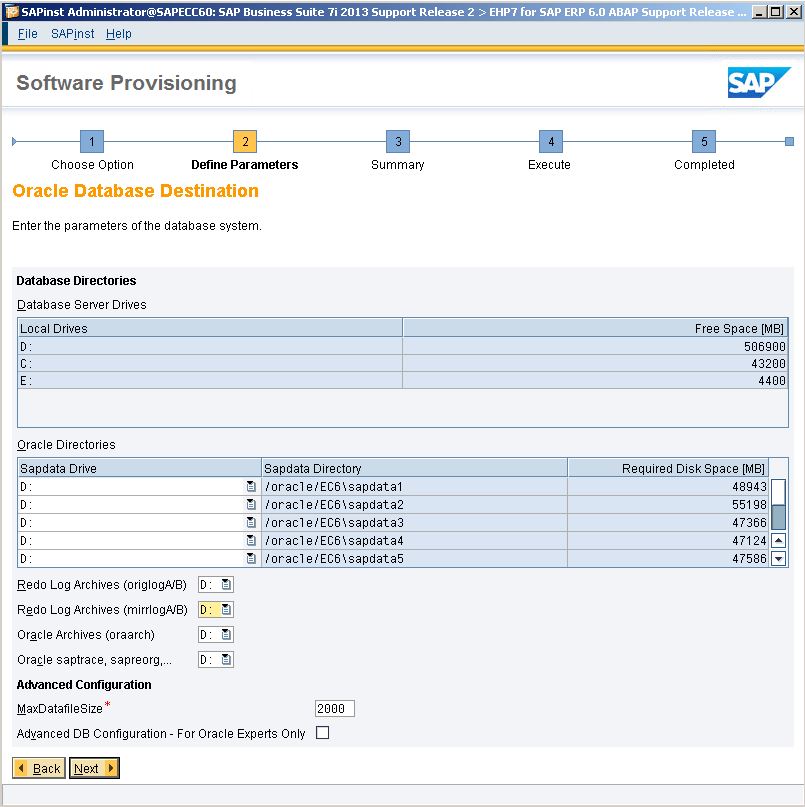
SAP Full Install – Oracle DB Destination I just made sure that everything is pointing to the same “D:” drive — even the Log Archives on the bottom of the window. Next.
- Oracle Database:
Just accept the defaults. Next. - Oracle Database Accounts:
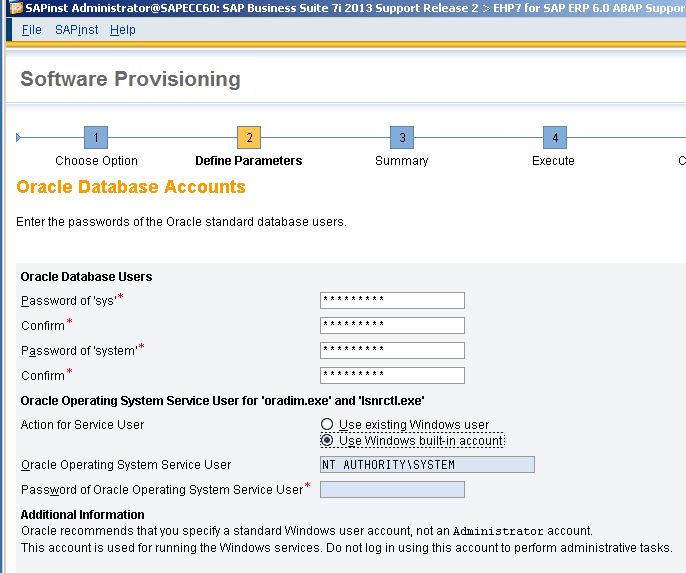
Accept the default passwords, but use the ‘Use Windows built-in Account’ option. Next. -

SAP Full Install – Oracle DB Accounts, Windows Built-in option Oracle Listener Configuration:
Just accept the defaults. Next. - Declustering / Depooling Option:
Select the ‘Do not decluster…’ option. Next. - SAP System Database Import:
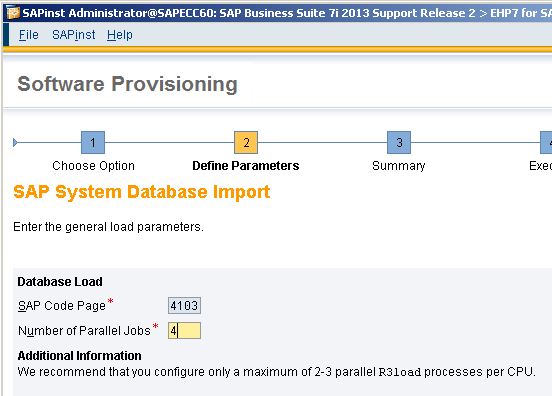
I changed the Number of Parallel jobs from ‘3’ to ‘4’; I have four cores on my CPU and SAP recommends 2 to 3 per processor. This controls the number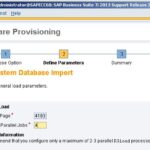
SAP Full Install – Parallel Jobs Selection of ABAP Import objects which can be processed at once. Having ‘4’ worked for me; you may wish to keep yours at ‘3’. I don’t think it will be a big impact either way. Next.
- Create Database Statistics:
Accept the defaults. Next. - Primary Application Server Instance and ABAP Central Services Instance:
Accept the defaults. Next. - ABAP Message Server Ports and Transport Host:
Accept the defaults. Next. - ICM User Management:
Accept the default password. Next. - SLD Destination for the SAP System OS Level:
Accept the default ‘No SLD destination’ value. Next. -

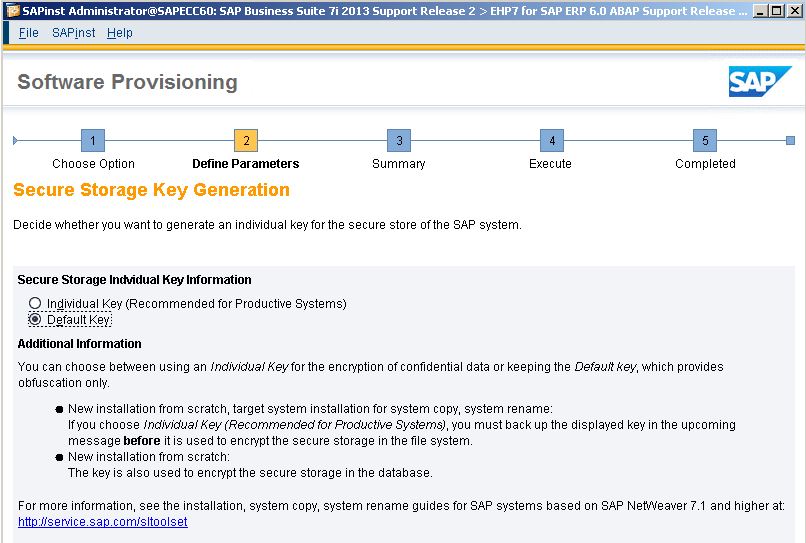
SAP Full Install – Default Key Selection Message Server Access Control List:
Accept the default ‘Do not create message server…’ value. Next. - Secure Storage Key Generation:
Select the ‘Default Key’ option since additional security is probably not required. Next. - Media Browser – Oracle Client 121:
Click the Browse button. From within the Oracle 12.1 Client package (package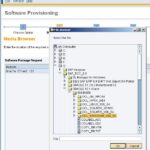
SAP Full Install – Oracle Client 12.1 # 51049088), select the folder which corresponds to your OS — mine is OCL_WINDOWS__X86_64 — and click ‘OK’. Next.
- Unpack Archives:
Leave everything checked. Next. - Install Diagnostics Agent:
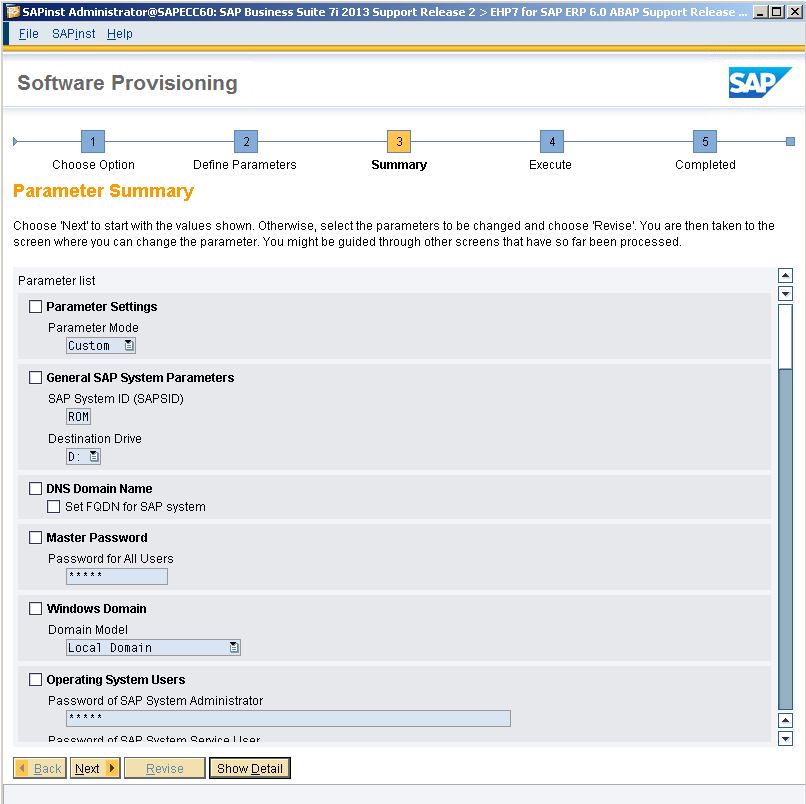
Can leave this unchecked since I won’t be using Solution Manager. Next. - Parameter Summary:
SAP Full Install – Pre-installation Summary This is your last chance to change parameters before installation. It is a good idea to review this list to make sure it makes sense. Check that the destination drives mentioned are the ones you want. Next.
- Task Progress:
The installation will begin. You’ll be presented with a ‘Task Progress’ screen which will help you track the progress of the installation. You should have 37 tasks (or Phases) included. Check in on the installation periodically to see how it’s progressing. This will probably take anywhere from 6 to 12 hours depending on the speed of your system.
NOTE: Towards the end, you may receive a warning indicating that the “Test logon to SAP system [SID] failed” for user DDIC. Don’t panic. This should be fine; the DDIC password should be the one that you setup previously.
ANOTHER NOTE: Frequently, I have had an error occur during the ‘Import ABAP’ phase. One or two of the objects error-out with error 103 (no additional info is given). Using the ‘Retry’ option, I have been able to re-run the errant processes successfully.
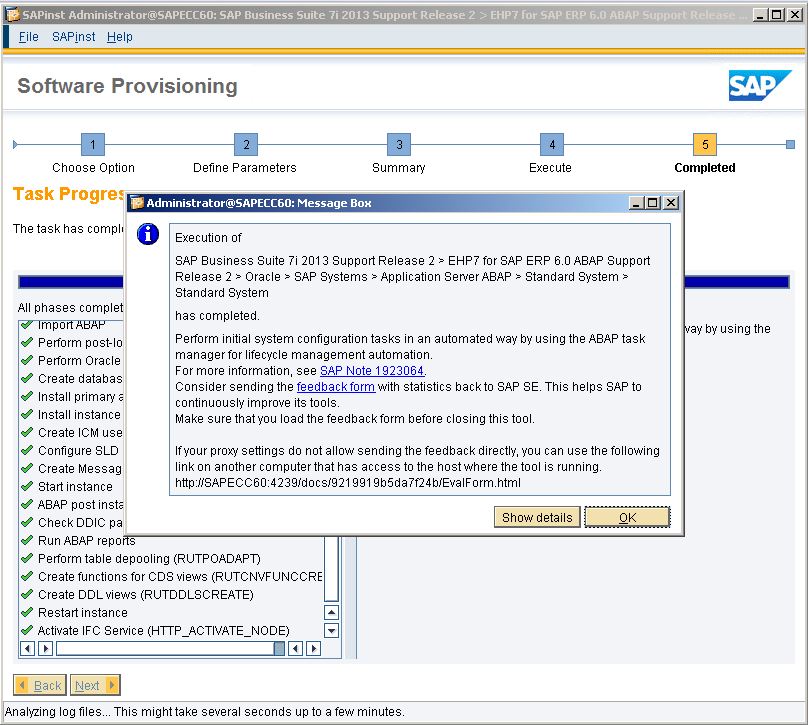
-
SAP Full Install – Success! The process will complete and you should see a pop-up Message Box indicating everything is completed. Click ‘OK’.
- A ‘Log Analyzer’ pop-up will appear next showing you where you can find the installation logs. Close this window and you’re done.


If issues do pop up…
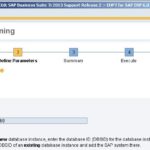
…you should have the option to perform a “Retry” function in which case SAP will attempt to re-perform the operation. I’ve tried this with mixed results — sometimes the installation completes successfully, and other times it continued to give me the same error. Apart from “Retry”, you also have the “Stop” option in which case you abort the installation. In theory, assuming you can correct whatever the main issue is, you should be able to pick up the installation where you left off. When you re-start the installation from the Software Provisioning Manager, it will find your previous installation attempt and present you with the option to continue with the “existing option” or create a “new option”. I recommend that you start from scratch with a new installation. Every time I attempted to use the “existing option” I always ended up with other issues down the road.
STEP 19: VERIFY YOUR ECC 6.0 IDES SERVER IS RUNNING
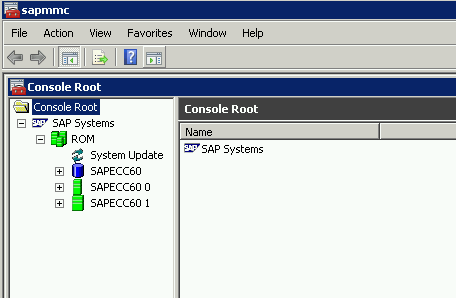
You should find an ‘SAP Management Console’ link on your desktop. Double click this to launch the console. Once inside, you’ll see a console tree which you can expand to see a more detailed status of your system. The screenshot to the right is what you SHOULD see for your system. The first green icon should be next to your System ID — ‘ROM’, in my case. That should be followed by two other green icons which may represent different instances or clients (not sure). At any rate, if yours looks like the screenshot, you should be in good shape.
STEP 20: INSTALL SAP GUI
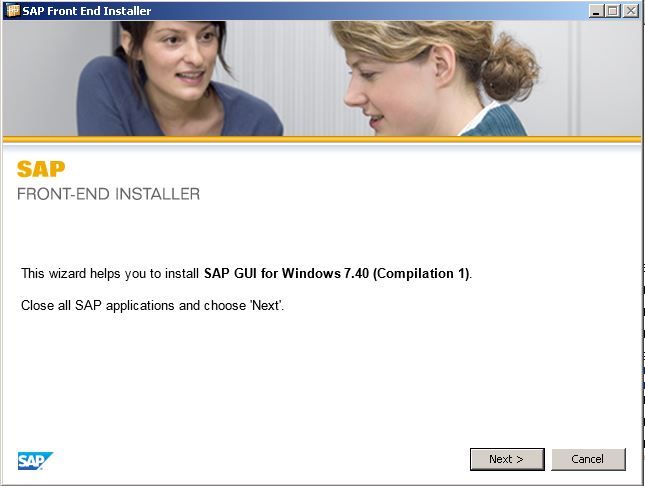
You want to use your new server, right? Then, you’ll need to install your SAP GUI. Luckily, you can find the latest SAP GUI version included in the “Presentation – 7.40 Compilation 1 Presentation 1” package (Package # 50127120_6). From within the package, execute the SapGuiSetup application located in the following path:
...\Presentation - 7.40 Compilation 1 Presentation 1\PRES1\gui\windows\win32\
Just follow the wizard to complete the installation. Select the “SAP GUI for Windows 7.40 (Compilation 1)” checkbox, and click “Next” and then “Next” again to get started.
Once installed, go ahead and start SAP GUI with the desktop icon. You’ll need to add your new server:
- Click the icon that looks like a blank sheet of paper.
- Click “Next”.
- Input your new connection’s parameters (see mine below) and click ‘Finish’.
Description          SAP ECC 6.0 IDES, EhP7
Application Server   192.168.25.25
Instance Number      00
System ID            ROM
That should do it.
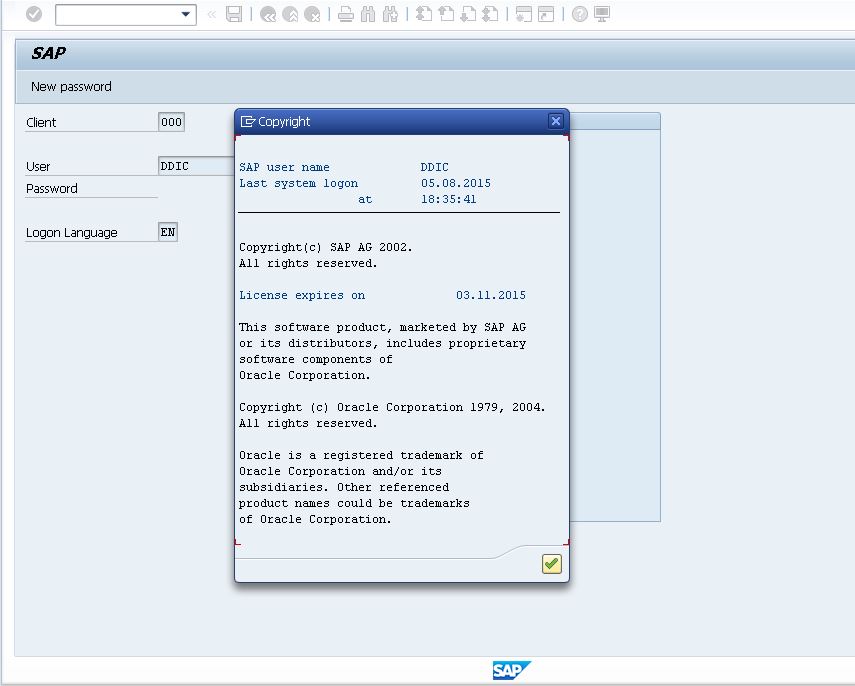
STEP 21: FIRST SAP ECC 6.0 IDES LOGON
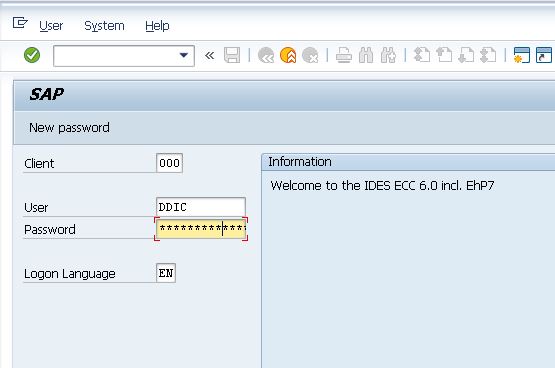
Here we are: The moment of truth. Fire up your new SAP connection from SAP GUI. For my first logon, I used the standard SAP user id DDIC. You should be able to use the default master password you chose during the installation.
What do you do from here? I would probably create a separate user ID for your normal day-to-day usage. I would perhaps copy the SAP* user id to a new one. Apart from that, you should be able to start using the system normally. If you wish to avoid the constant “compiling” which you will see, you can attempt to run
SGEN to generate all those objects. I may create a separate guide for doing so later on (or I may not, don’t hold your breath).
IMPORTANT NOTE: While creating my own user ID in my new SAP system, I encountered an error:
Category                ABAP Programming Error
Runtime Errors          GETWA_NOT_ASSIGNED
ABAP Program            SAPLCRFC
Application Component   BC-MID-RFC
The root cause of this error (at least, in my case) was that the RFC destination was not setup for the Transport Management System (TMS). Additional information is included in the following SAP Note: 2051222 – Dump GETWA_NOT_ASSIGNED RFC_READ_R3_DESTINATION. Following instructions on this SAP help page resolved the issue.
STEP 22: TAKE A SNAPSHOT
We’ve come a long way and there are too many ways to screw up an SAP This is the third installment of my SAP ECC 6.0 IDES series in which I walk through how to download, install, and run your very own ECC 6.0 IDES server. installation. It may be a good time to take a VirtualBox Snapshot to preserve the system state in case we need to trudge back to this point.
CONCLUSION
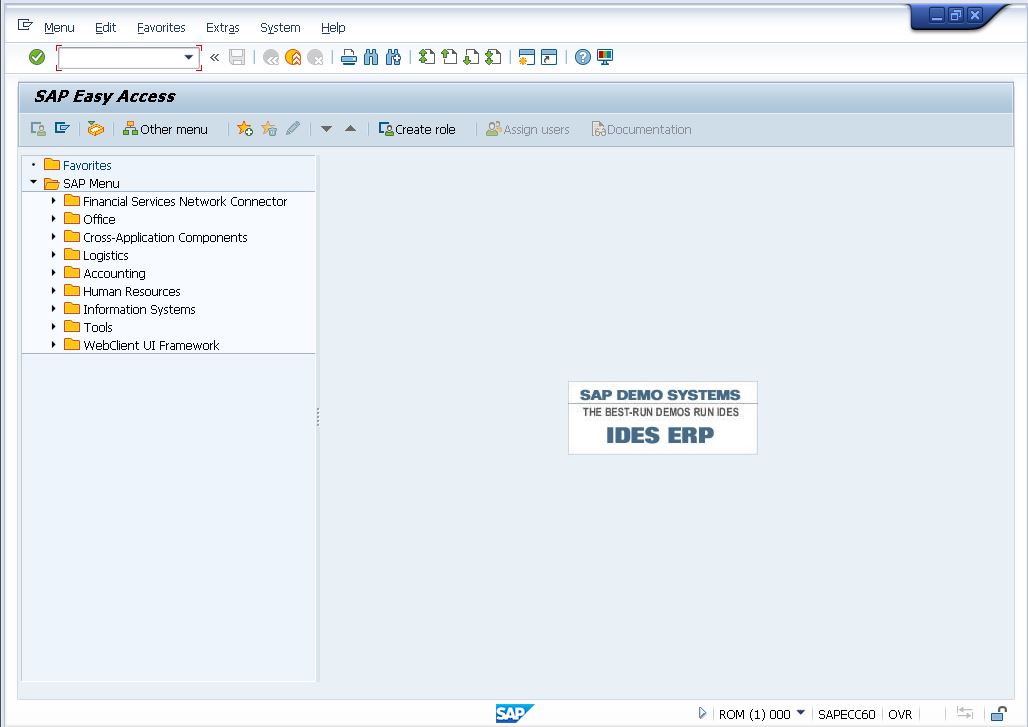
There you have it: You’ve just logged on to a fully-functional SAP ECC 6.0 IDES system running on your very own hardware. Congratulations! With any luck, you’ve endured a lot fewer re-starts than I have. I’m too embarrassed to admit the number of times I had to restart this whole process.
I don’t know about you, but I now have a lot more respect for all those Basis consultants out there who deal with this type of stuff (and much more) day-in and day-out. Of course, there’s a lot more to this in the real world. If this guide helped you, please let me know in the comments. Likewise, if you’re stuck I will try to offer what meager assistance I can. Best of luck to you!
…but, wait… There’s more! Stay tuned for a bonus article where I tackle some additional topics to consider and help you along your way to running SAP ECC 6.0 IDES.
Leave a Reply